

What Are the Steps to Installing a Sump Pump?
The contractors you reach out to for sump pump installation will be able to take the stress of that installation off of your hands. That said, you can still keep up with the steps they’re taking to ensure that your sump pump does its job to the best of its ability.
When installing a sump pump, the contractors you choose to work with will:
Step 1: Find the Best Installation Location
Much like shopping for a home, installing a sump pump is all about location, location, location. More often than not, you’ll want to try and install a sump pump in the part of your home that sees the most water damage on a regular basis. Sump pumps, after all, work best when they’re protecting your home from concentrated water damage. If you try to spread your sump pump’s reach out over a broader swath of basement, then you’re not as likely to see just how effective these pumps can be.
Step 2: Dig Out a Pump Hole
Once you’ve determined the best location for your sump pump, the contractors you’re working with can dig out a pump hole. The size of this hole will vary based on the brand and size of the sump pump you want to invest in. The process, however, should take no more than half a day and maybe less, provided you don’t have any cracks or other types of damage slowing down your work.
Step 3: Insert Your Pump
With the hole dug, contractors can place the appropriate sump liner in the hole and then set up your sump pump inside the liner, ensuring that it can reach the electrical source it needs to run properly.
Step 4: Install a Check Valve
With your sump pump plugged in and prepared to get to work, contractors can then go about fitting any accessories or necessary aids. Check valves, for example, keep the water your sump pump removes from your home from flowing back into your basement after a pump forces it out. Without a check valve in place, you risk dealing with not only the initial flow of water into your home but its return along with any debris it may have picked up along the way.
Step 5: Install discharge lines
Next, contractors will need to install exterior discharge lines that will help in taking water from your sump pump out of and away from your home. In establishing this system of pipes, you prevent the water you push out of your home from readily making its way back indoors. At the same time, you create a barrier between your basement and any groundwater that might approach it, effectively installing a drain at the same time you install your sump pump.
Step 6: Seal Off Your Pipes
With your pipes installed and your pump in place, contractors can apply sealant to any gaps or holes that might allow water to spill out of your system.
Step 7: Cover Your Pump
Last but not least, an airtight lid is placed on your sump pump to protect your system from unwanted damage. Once this work is done, you’ll be able to sit back, relax, and rest easy knowing that your home is unlikely to fall victim to water damage anytime soon.
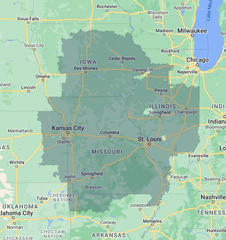
Our Locations
3349 Southgate Ct SW,
Cedar Rapids, IA 52404
(319) 220-5034
14678 E 925 North Rd, Building 5
Bloomington, IL 61705
2401 SE Creekview Dr.
Ankeny, IA 50021
(515) 373-8491
7280 NW 87th Terrace, Suite C-210
Kansas City, MO 64153
(816) 774-1539
211 SE State Route 150
Lee's Summit, MO 64082
(816) 774-1539
1872 State Hwy M
Moberly, MO 65270
(660) 202-8662
3020 N. Martin Ave.
Springfield, MO 65803
(417) 612-8286
1625 Larkin Williams rd.
Fenton, MO 63026
(314) 207-9995